Host One or Multiple Websites with Nginx on Ubuntu Server
Set up Nginx server blocks, PHP-FPM, MySQL, and WordPress for one or more websites on Ubuntu.
This guide uses Ubuntu because it is approachable for new users. The same general approach also works on other Linux server distributions.
The original guide uses PHP 8.0 commands. Select a currently supported PHP version that is compatible with your Ubuntu release before using it on a new server.
Update Ubuntu
sudo apt-get update && sudo apt-get dist-upgrade && sudo apt-get autoremove # refresh package lists, upgrade everything, remove unneeded packages
Install Nginx
Install Nginx and check that the service is running:
sudo apt-get install nginx      # install Nginx
sudo systemctl status nginx      # confirm the service is running
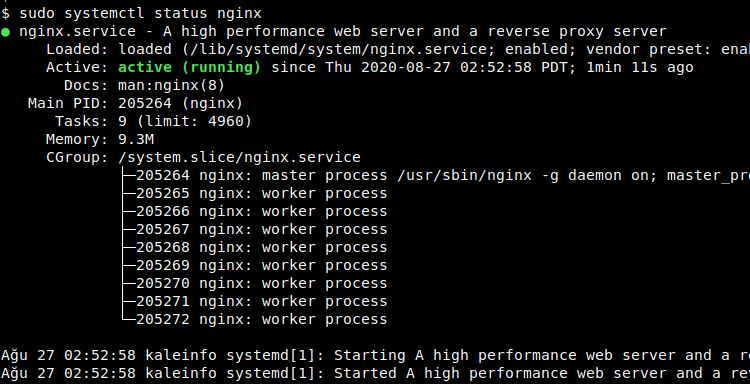
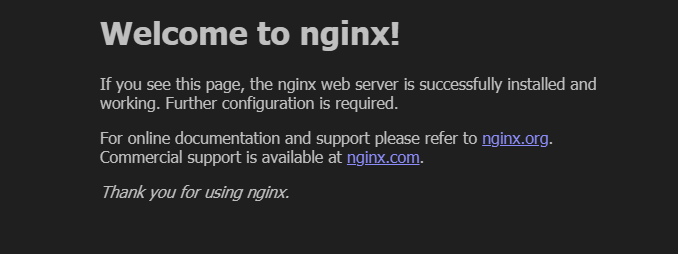
Then open http://localhost in a browser to confirm that Nginx is serving a page.
Install PHP and PHP modules
WordPress needs PHP and several PHP modules. The following commands reflect the original PHP 8.0 setup:
sudo apt-get install software-properties-common      # needed to manage third-party PPAs
sudo add-apt-repository ppa:ondrej/php                 # add Ondřej Surý's PPA for current PHP versions
sudo apt update                                          # refresh package lists to pick up the new PPA
sudo apt install php8.0-fpm php8.0-common php8.0-mysql php8.0-gmp php8.0-curl \
  php8.0-intl php8.0-mbstring php8.0-xmlrpc php8.0-gd php8.0-xml php8.0-cli php8.0-zip   # PHP-FPM and every module WordPress needs
sudo systemctl status php8.0-fpm                            # confirm PHP-FPM is running
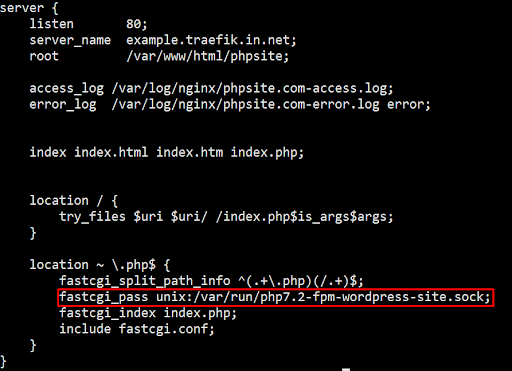
Configure Nginx for PHP-FPM
Open the PHP-FPM pool configuration when you need to adjust its settings:
sudo nano /etc/php/8.0/fpm/pool.d/www.conf # open the PHP-FPM pool config
Install and configure MySQL
Install MySQL, check the service, and secure the installation:
sudo apt install mysql-server              # install MySQL
sudo systemctl status mysql                 # confirm the service is running
sudo mysql_secure_installation                # set the root password and lock down defaults
Sign in to MySQL with the password you created:
sudo mysql -u root -p # open a MySQL shell as root
Create a database and user for each website. Replace the example names and password with your own values:
CREATE USER 'alexandar'@'localhost' IDENTIFIED BY 'password';  -- create a dedicated user for this site
CREATE DATABASE wpsite1db;                                       -- one database per website
CREATE DATABASE wpsite2db;                                        -- a second site's database
GRANT ALL ON *.* TO 'username'@'localhost';                         -- grant that user full privileges
FLUSH PRIVILEGES;                                                     -- reload MySQL's privilege tables
exit;                                                                   -- leave the MySQL shell
You can create additional databases and users for additional sites.
Create document roots
Each Nginx server block needs a matching root directory. Create one directory for each site:
sudo mkdir -p /var/www/site1.com   # document root for site 1
sudo mkdir -p /var/www/site2.com    # document root for site 2
Download and extract WordPress into each directory, or create an index.html file for a static site.
Assign the directories to your normal user account so that you can edit their contents without sudo:
sudo chown -R $USER:$USER /var/www/example.com/html   # let your user edit this site without sudo
sudo chown -R $USER:$USER /var/www/test.com/html        # same for the second site
sudo chmod -R 755 /var/www                                 # read/execute for others, write only for the owner
Depending on the application, you may need to adjust ownership and permissions to let www-data write where necessary.
Create Nginx server blocks
Create one Nginx configuration file per website. You can begin by copying the default configuration:
sudo cp /etc/nginx/sites-available/default /etc/nginx/sites-available/example1.com   # start from the default block as a template
sudo cp /etc/nginx/sites-available/default /etc/nginx/sites-available/example2.net    # same for the second site
sudo nano /etc/nginx/sites-available/example.com                                        # edit the new config for this site
Use a server block like this for each website, changing the domain name and document root:
server {
    listen 80;
    listen [::]:80;
    root /var/www/html/mysite.com;
    index index.php index.html index.htm;
    server_name mysite.com www.mysite.com;

    error_log /var/log/nginx/mysite.com_error.log;
    access_log /var/log/nginx/mysite.com_access.log;
    client_max_body_size 100M;

    location / {
        try_files $uri $uri/ /index.php?$args;   # send anything that isn't a real file to WordPress' front controller
    }

    location ~ \.php$ {
        include snippets/fastcgi-php.conf;
        fastcgi_pass unix:/run/php/php8.0-fpm.sock;   # must match the actual PHP-FPM socket path
        fastcgi_param SCRIPT_FILENAME $document_root$fastcgi_script_name;
    }
}
Repeat the process for every additional site.
Enable the server blocks and reload Nginx
Enable each server block with a symbolic link:
sudo ln -s /etc/nginx/sites-available/example.com /etc/nginx/sites-enabled/   # enable this site
sudo ln -s /etc/nginx/sites-available/test.com /etc/nginx/sites-enabled/        # enable the second site
If your configuration has many server names, open the Nginx configuration:
sudo nano /etc/nginx/nginx.conf # edit the global nginx config
Uncomment or add server_names_hash_bucket_size in the http block:
http {
    server_names_hash_bucket_size 64;
}
Validate the configuration before reloading Nginx:
sudo nginx -t                    # validate the config syntax
sudo systemctl restart nginx      # apply the change
Install WordPress
Download WordPress and copy its contents into each document root:
cd /tmp                                          # work from a scratch directory
wget http://wordpress.org/latest.tar.gz           # download the latest WordPress release
tar -xzvf latest.tar.gz                             # extract the archive
sudo cp -r wordpress/* /var/www/site1/                # copy WordPress into site 1's document root
sudo cp -r wordpress/* /var/www/site2/                  # same for site 2
sudo cp -r wordpress/* /var/www/site3/                    # same for site 3
Set appropriate ownership and permissions, then prepare the WordPress configuration:
sudo chown -R www-data:www-data /var/www/site*   # give ownership to the user nginx/PHP-FPM runs as
sudo chmod -R 775 /var/www/mysite.com               # allow the group to write too, for uploads/updates
cd /var/www/mysite.com                                # move into the site's document root
sudo mv wp-config-sample.php wp-config.php              # start from WordPress's sample config
sudo nano wp-config.php                                   # fill in the database and API key values
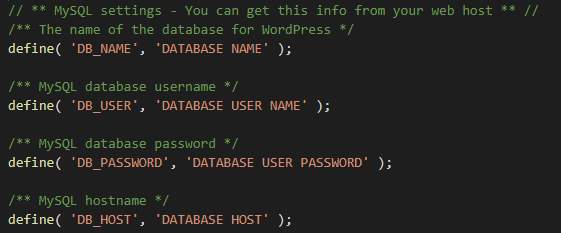
Add the database values and WordPress API keys to wp-config.php, then test and reload Nginx again:
sudo nginx -t                    # validate the config syntax
sudo systemctl restart nginx      # apply the change
Optional local host entries
For local testing, add the domain names to /etc/hosts:
sudo nano /etc/hosts # map test domain names to this machine locally
127.0.0.1 localhost
203.0.113.5 example.com www.example.com   # local-only test entry - remove before going to production